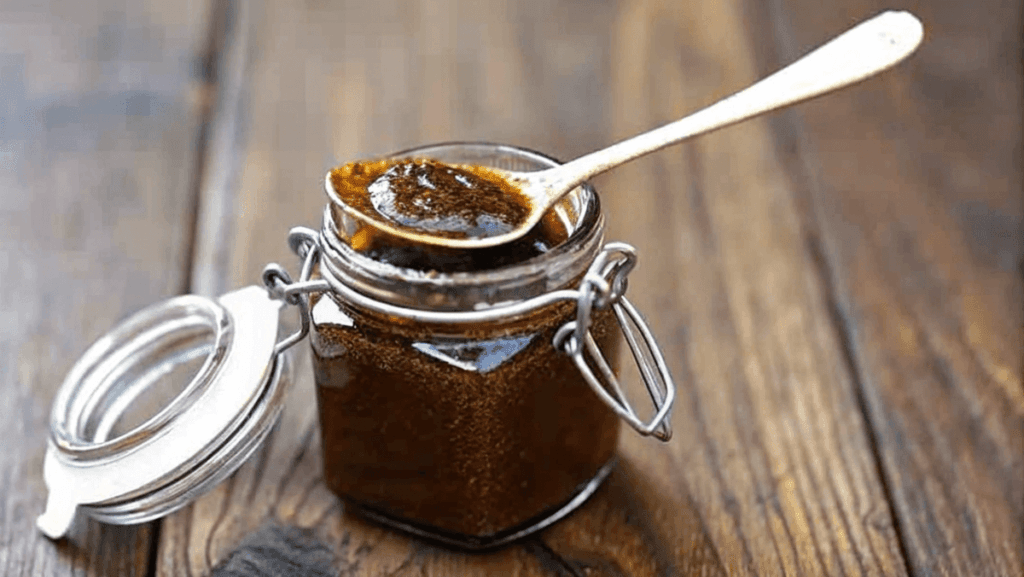
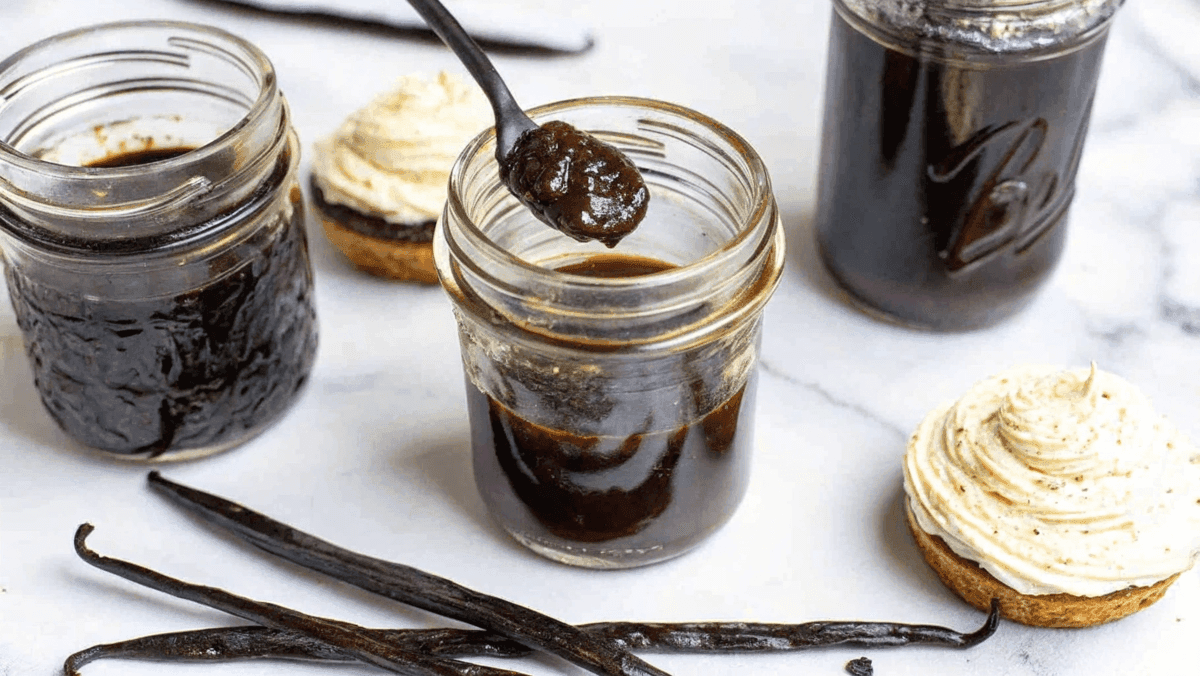
In this article, we’re going to explore everything you need to know about making a vanilla paste recipe from scratch. If you’ve ever wanted a richer, more authentic vanilla flavor in your baking, you’re in the right place! Not only will we guide you through making your own vanilla bean paste, but we’ll also show you how to use it in various culinary delights. Whether you’re a seasoned baker or just beginning your kitchen adventures, you’ll discover simple yet effective ways to create this staple ingredient.
Table of contents
Introduction to Vanilla Bean Paste
What Is Vanilla Bean Paste?
If you’ve never tried it, vanilla bean paste might sound like a bit of a mystery. So, what exactly is it? Vanilla bean paste is a thick, aromatic syrup made by blending actual vanilla bean seeds with vanilla extract, sugar, and sometimes a little water or alcohol. The result? A luxurious, intense vanilla flavor with the added texture and aroma of the bean seeds. It’s a perfect substitute when you want the purest vanilla taste without dealing with the fiddly pods.
What makes vanilla bean paste even more appealing is its versatility. It’s great for cooking, baking, and even in no-cook recipes like ice cream and custards. Plus, it gives you those lovely flecks of vanilla seeds that elevate the look of any dish—think swirled into whipped cream or stirred into cakes. Pretty neat, right?
Why Make Your Own Vanilla Bean Paste?
Store-bought vanilla bean paste can be pricey and, honestly, often lacks the depth of flavor you’ll get from making your own. When you make your vanilla paste at home, you’re in control of all the ingredients, and you get a far richer and fresher product than what you might find on the shelves.
Let’s face it—making your own vanilla bean paste not only saves you some dollars, but it’s also way easier than it sounds. By using a few simple ingredients and steps, you can craft a batch of vanilla paste that’ll last a while and have your baked goods tasting like they’ve come straight out of a fancy bakery. Trust me, once you try it, you might never go back to store-bought vanilla again!
Stay tuned as we break down the ingredients, step-by-step process, and all those delicious ways you can use your homemade vanilla paste!

Ingredients and Equipment Needed
Essential Ingredients
To create a homemade vanilla paste recipe, you’ll need just a few simple ingredients. By using quality ingredients, you’ll ensure that your vanilla paste has the richest flavor possible. Here’s what you’ll need:
- 30 whole vanilla beans
The heart of any vanilla paste recipe is, of course, the vanilla beans. You’ll need around 30 whole vanilla beans. Try to use high-quality, Madagascar or Tahitian vanilla beans for the best results. - 6 tablespoons vanilla extract
Vanilla extract will help to bring together all the flavors and enhance the aromatic quality of your paste. Choose pure vanilla extract for a smoother taste. - 1⅔ cups agave nectar or vegetable glycerine
These sweeteners help to create the paste-like texture that sets vanilla paste apart from regular liquid vanilla extract. Agave nectar works well because it’s thinner than other syrups, while vegetable glycerine has a slightly thicker texture.
These ingredients combine to give you that beautiful rich vanilla flavor with perfect consistency—ideal for all your baking needs.
Recommended Equipment
Once you’ve gathered your ingredients, it’s time to prepare. A few kitchen tools will make the process a breeze:
- High-speed blender
You’ll need a good blender to combine the ingredients into a smooth paste. A high-speed blender helps break down the beans into fine particles and allows all the ingredients to mix perfectly. - Fine mesh strainer
After blending, you’ll want to strain out any excess solids from the mixture to ensure your vanilla paste has a silky smooth texture. - Storage jars with tight-fitting lids
Finally, you’ll need jars to store your vanilla paste. Glass jars work well, and ensuring the lids are tight will keep your paste fresh for longer.
With these ingredients and equipment, you’re all set to start crafting your very own homemade vanilla paste!
Step-by-Step Instructions
Preparing the Vanilla Beans
The first step in making a delicious vanilla paste recipe is preparing the vanilla beans. Begin by slicing each vanilla bean lengthwise with a sharp knife. This will reveal the tiny black seeds (called caviar) inside the beans. Be sure to scrape the seeds out and keep them—you’ll need them for the paste!
Once you’ve scraped out all the seeds, chop the vanilla beans into smaller pieces. Cutting the beans helps the blender process them better and ensures that all the bean contents blend evenly. It’s the little things like this that make a huge difference in the final result!
Blending the Ingredients
Now it’s time to mix the ingredients! In your high-speed blender, combine the chopped vanilla beans, vanilla extract, and agave nectar (or vegetable glycerine). When adding the ingredients, be sure to scrape out every last bit of the vanilla seeds.
Once everything is in the blender, blend on high until the mixture achieves a thick, paste-like consistency. It should be smooth, with no chunks or undissolved particles. If the mixture seems too thick, you can add a little more agave nectar or glycerine to adjust the texture.
This is the fun part because you can really smell the vanilla intensifying as it blends! Take a moment to appreciate the rich aroma before moving to the next step.
Straining the Paste
Even though you’ve blended the mixture well, some solid parts of the vanilla bean might remain in the paste. To ensure you end up with a smooth vanilla paste, it’s time to strain the mixture.
Place a fine mesh strainer over a clean bowl or jar, and pour the blended vanilla paste through it. Gently press down on the mixture with a spoon or spatula to extract every drop.
This step helps remove any tiny bean bits or other pieces that didn’t break down during blending. The result is a perfectly smooth, silky vanilla paste ready for use in all your recipes.
Storing the Vanilla Bean Paste
Once the vanilla paste has been strained and is completely smooth, it’s time to store it. Using glass jars with airtight lids, transfer the paste into your containers, filling them up to the top.
Seal the jars tightly and store them in a cool, dark place, such as a pantry. Let the paste sit for a couple of days to fully settle, and the flavors will develop and deepen.
While you can use your vanilla bean paste right away, waiting a week or two will allow the vanilla flavors to mature. This is a small but worthwhile step that makes the paste even more delicious.
Now that you’ve made your own vanilla paste recipe, you’ll have it on hand whenever a recipe calls for vanilla extract or vanilla beans. Enjoy the depth of flavor that homemade vanilla paste brings to all your cooking and baking!
Tips and Variations
Adjusting Consistency
When it comes to a vanilla paste recipe, consistency is key, and you may want to adjust it based on your needs. If you prefer a thicker paste, it’s simple to do! You can reduce the amount of liquid ingredients, such as agave nectar or glycerine, when blending. On the other hand, if you like a smoother and thinner paste, just add a bit more liquid, one tablespoon at a time, until you achieve the desired thickness.
Adjusting consistency isn’t just about texture—it can also affect how much flavor the paste packs. A thicker vanilla paste will have a stronger vanilla presence, which is perfect for high-impact desserts like vanilla bean ice cream or custards. So, depending on your recipes, make the right adjustments!
Flavor Enhancements
While the classic vanilla paste recipe focuses mainly on the vanilla beans and extract, there’s always room for experimenting with different flavors. For a more complex taste, consider adding a touch of corn syrup, which not only adds sweetness but also helps thicken the paste.
Additionally, you can try alternative sweeteners such as maple syrup or honey. These offer subtle flavor differences that complement the vanilla perfectly. If you’re in the mood for something unique, add a dash of citrus zest or a sprinkle of cinnamon for a one-of-a-kind twist on your vanilla paste.
Storage Recommendations
Your homemade vanilla paste recipe will last longer and retain better flavor if stored properly. Once in your glass jars, place the jars in a cool, dark place, such as a pantry or cupboard. You can also refrigerate the paste to prolong its shelf life. Just remember to always seal the jars tightly to prevent air from getting in.
Allow the paste to sit for at least a week before using it; this allows the flavors to deepen. Over time, the paste will actually improve and become even more flavorful. So, be patient—your efforts will pay off!
Frequently Asked Questions
Can I Use Vanilla Bean Paste Immediately After Making It?
One of the most common questions about a vanilla paste recipe is whether you can use the paste right away. Technically, yes, you can. However, the flavor will develop more intensely if you let it sit for a few days before use. A resting period of about one week enhances the flavor and aroma of the paste.
How Should I Store Homemade Vanilla Bean Paste?
After making your vanilla paste recipe, store it in a tightly sealed glass jar and keep it in a cool, dark area away from direct sunlight. You can refrigerate it for added shelf life, but this isn’t strictly necessary as long as the jar is sealed properly.
Can I Substitute Vanilla Extract for Vanilla Bean Paste in Recipes?
Absolutely! You can substitute vanilla extract for vanilla bean paste, but keep in mind that vanilla bean paste offers a more robust flavor and adds visual appeal with the inclusion of vanilla seeds. To substitute, use about 1 tablespoon of vanilla paste for each teaspoon of vanilla extract called for in the recipe.
Culinary Uses of Vanilla Bean Paste
Baking Applications
The possibilities for incorporating homemade vanilla paste into your baking are endless! One of the most common and effective ways to use vanilla paste recipe is in cakes, cookies, and pastries. It adds an extra layer of depth to your favorite dessert recipes. The rich, intense flavor of the paste will shine through in buttercream frosting, ensuring your frosting tastes as good as it looks.
Try it in pound cakes, layered cakes, and especially in cookies for that extra bit of vanilla goodness. When you replace traditional vanilla extract with vanilla paste, you’ll notice your treats have a brighter, more authentic vanilla flavor. Additionally, the little vanilla specks look beautiful, adding visual interest to the final product!
Dessert Enhancements
Another great use for vanilla paste recipe is in no-bake and custard desserts. A spoonful of homemade vanilla paste will elevate any dessert, whether it’s puddings, custards, or ice creams. The creamy texture of these dishes will mix wonderfully with the paste, making them even more decadent.
For something simple and easy, stir some vanilla paste into your whipped cream or yogurt for a delicious topping that’s sure to impress. It works in parfaits, milkshakes, and even mousse, providing that perfect touch of vanilla flavor every time. Trust me, once you’ve used homemade vanilla paste, you won’t want to go back!
Beverage Flavoring
Although vanilla paste recipe is usually thought of for baking, it also shines in drinks! If you’re making coffee or tea, a small spoonful of vanilla paste can give your beverage that special homemade flavor. Blend it into your latte for a smooth, sweet, and naturally flavored drink.
Vanilla paste also pairs wonderfully with smoothies, enhancing fruit combinations like banana or strawberry. Try adding a dollop of it to your milkshake for an extra hint of sweetness, or add it to cocktails and mocktails for that gourmet twist!
Nutritional Information
Caloric Content
While homemade vanilla paste recipe is a tasty addition to many dishes, it’s important to keep track of the nutritional values. On average, there are about 20 calories per teaspoon of vanilla paste.
Sugar Content
As with many sweetened recipes, vanilla paste contains natural sugars from the agave nectar or glycerine used in the recipe. A teaspoon of vanilla paste can have around 4-5 grams of sugar depending on the sweetener used.
Allergen Information
Most vanilla paste recipes are allergen-friendly, but if you’re using glycerine or certain syrups, check their labels for any possible allergens. The paste is typically free of gluten, dairy, and nuts, making it a safe addition to many dishes. Always check the ingredients for peace of mind when sharing with others.
Troubleshooting Common Issues
What to Do If Your Vanilla Paste Is Too Thin
Sometimes, your vanilla paste recipe might turn out thinner than expected. If that happens, don’t worry—there’s a simple solution. To thicken the paste, you can gently simmer the mixture on low heat for a few minutes to reduce the liquid. Alternatively, add a bit more vegetable glycerine or agave nectar during the blending process.
Keep in mind that the ideal consistency should be similar to honey or maple syrup—smooth, thick, and spreadable. Adjusting it ensures you get that perfect consistency every time, perfect for drizzling into cakes or incorporating into frostings!
If Your Vanilla Paste is Too Thick
On the flip side, if your vanilla paste recipe turns out too thick, it can be easily adjusted. Thin the paste by adding a little more vanilla extract or warm water, one teaspoon at a time. Stir until you reach the desired consistency. Just remember to take it slow when adding liquid, since a little goes a long way.
If you’re still not getting the right thickness, try pulsing the mixture in a blender briefly—sometimes the thickness is a result of insufficient blending. Fine-tuning the texture is all part of making a great vanilla paste, so don’t be afraid to make small adjustments to get it just right! For another recipe, check out the Churu Chicken Amarillo Recipe.


1 thought on “Homemade Vanilla Bean Paste Recipe”